Be built (to last).
The right supplements can help you recover naturally and build a resilient body.

Supplement Quiz
Take this short quiz to discover the perfect supplements for your needs and goals.
About SaltWrap
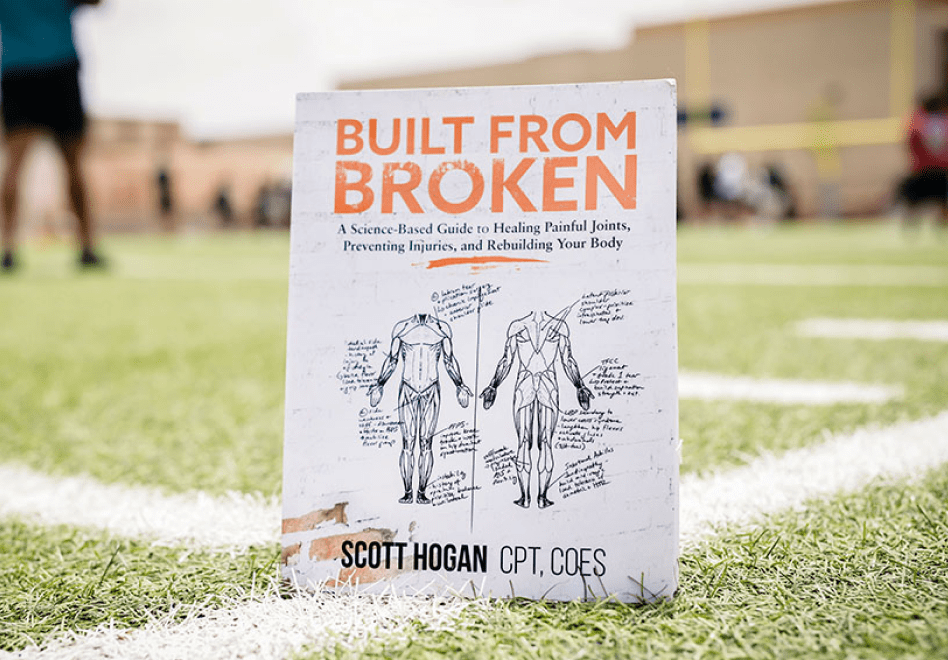
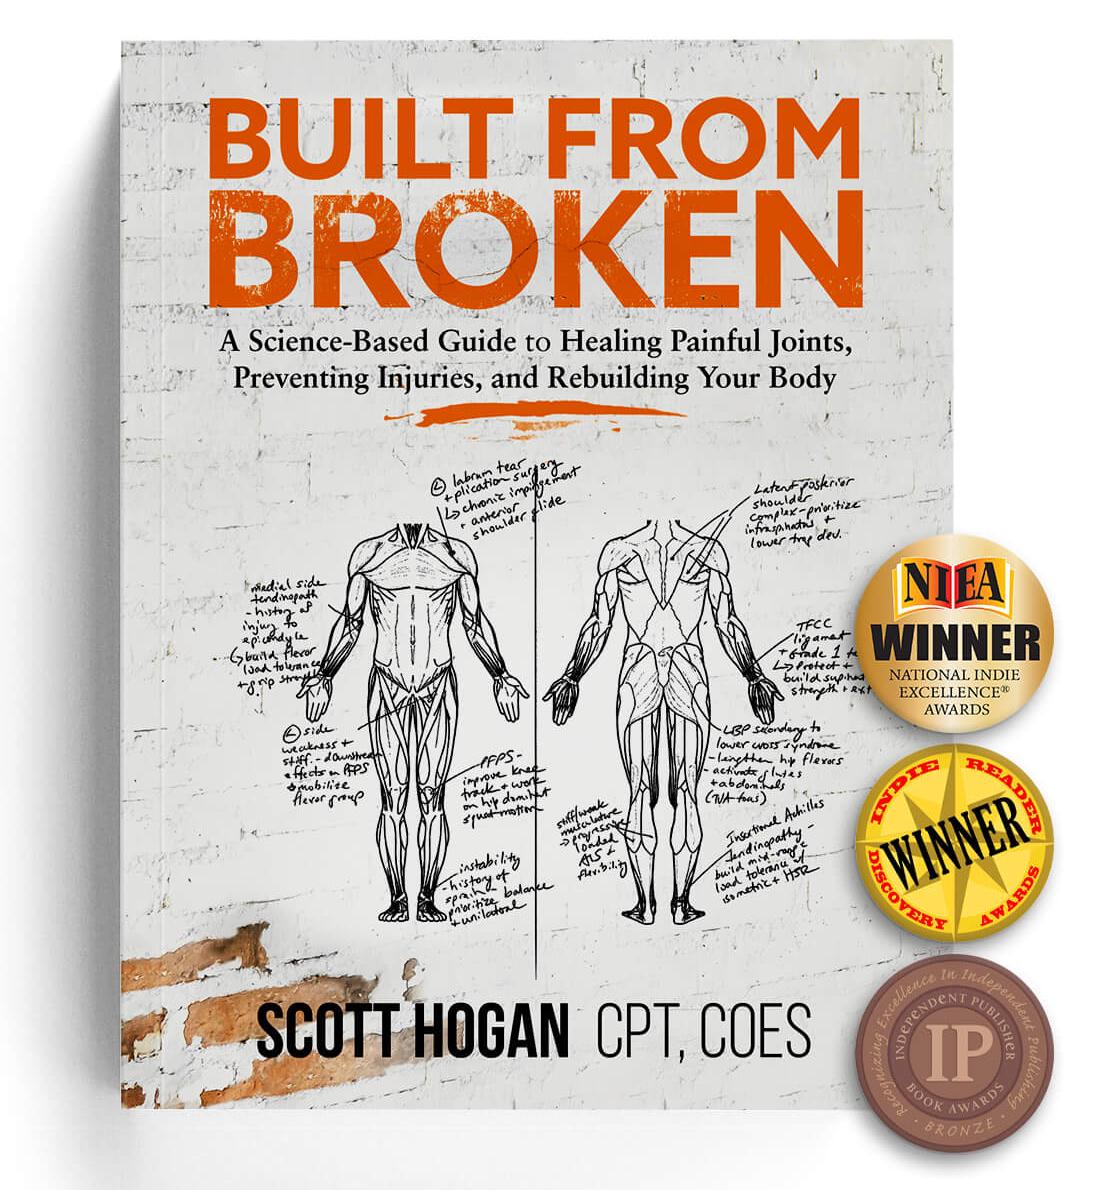
Built from Broken
Get the best-selling book from SaltWrap founder, Scott Hogan, and start rebuilding today.
The Ultimate 5-Step Injury Recovery Guide
by Scott Hogan, ACE-CPT, COES
In this article, I lay out the fundamental steps for recovering from any minor injury.
The goal is to arm you with enough knowledge so that you know when to seek medical attention, when to rest, and when (and how) to push through your injury to the other side.
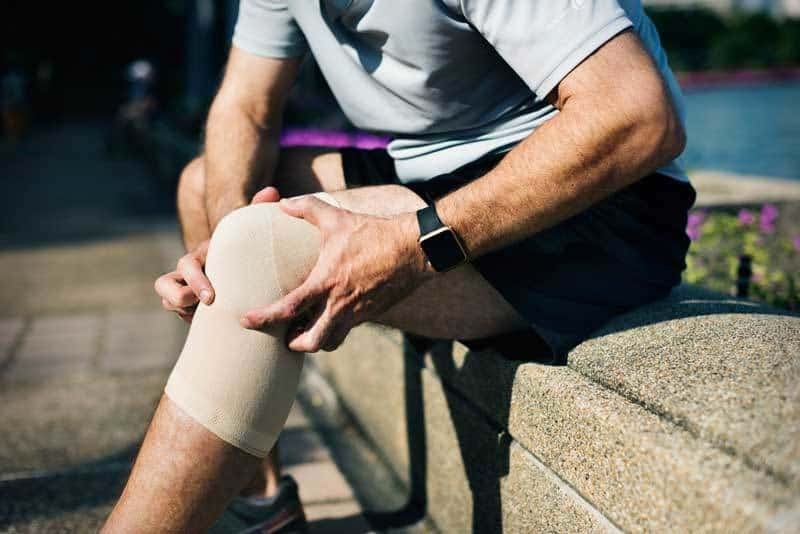
You did it again.
And it wasn’t from something crazy — like down-hill running or trying to do a back flip off your house.
You were just doing what millions of people do every day.
Lifting weights, running, playing tennis or kicking a soccer ball.
And now your knee is busted.
Or your shoulder is clicking and throbbing.
Or your elbow is so sore you can hardly pick up a dumbbell (or computer mouse).
The worst thing you can do is pretend it’s not happening.
Try to tough it out.
That’s a recipe for ending up on the operating table.
Or at least having to take a 6-8 week hiatus from working out.
The inconvenient truth is that minor injuries happen all the time.
You’ll be hard-pressed to find any high level athlete that hasn’t battled through multiple injuries.
The people who stay healthy and continue making progress over the long haul have figured out how to quickly recognize and address these minor setbacks.
There’s a fine line between pushing past discomfort and risking serious injury. But with some training experience, and being brutally honest with yourself — you can be your own rehab specialist.
While your injury — and your physiology — is much too individual to address with an exact recipe, we can still provide the framework for navigating through minor strains, “tweaks”, and other overuse injuries like tendinopathy.
That being said…
We know you're tough — but you also need to be smart.
If you suspect a serious injury or if you have any of these signs, get some help. This article is NOT a replacement for medical attention:
When to seek medical attention
- Abnormal bone, joint, or muscle positioning (e.g. it looks crooked or is misshapen)
- Excessive swelling, bruising, bleeding
- Sharp pain when performing previously pain-free movements
- Inability to bear weight on the limb or joint without it giving way
- A feeling of abnormal “looseness” in the joint
A torn hamstring is treated in a completely different way than tendinopathy in the knee, or a sprained ankle, or herniated disc in the back.
There’s just too much variability to provide an exact recovery protocol you can follow no matter the injury. So instead, the goal of this article is to:
- give you a baseline understanding of the injury recovery process
- help you determine when it’s OK to self-diagnose and when you should seek medical attention
- show you how to establish recovery goals and timelines
- and most important — how to prevent it from happening again
Use this guide as a template for bouncing back from your next sprain, strain or case of tendinopathy.
Let’s get into it.
The Evolution of Injury Recovery Advice
In 1978, Dr. Gabe Mirkin coined the term RICE in his best seller The Sportsmedicine Book to describe a simple method of caring for acute injuries.
The concept was straightforward and intuitive and gained immediate widespread acceptance:
-
Rest: Because you just hurt yourself. No further explanation needed.
- Ice: To reduce swelling, inflammation, and pain.
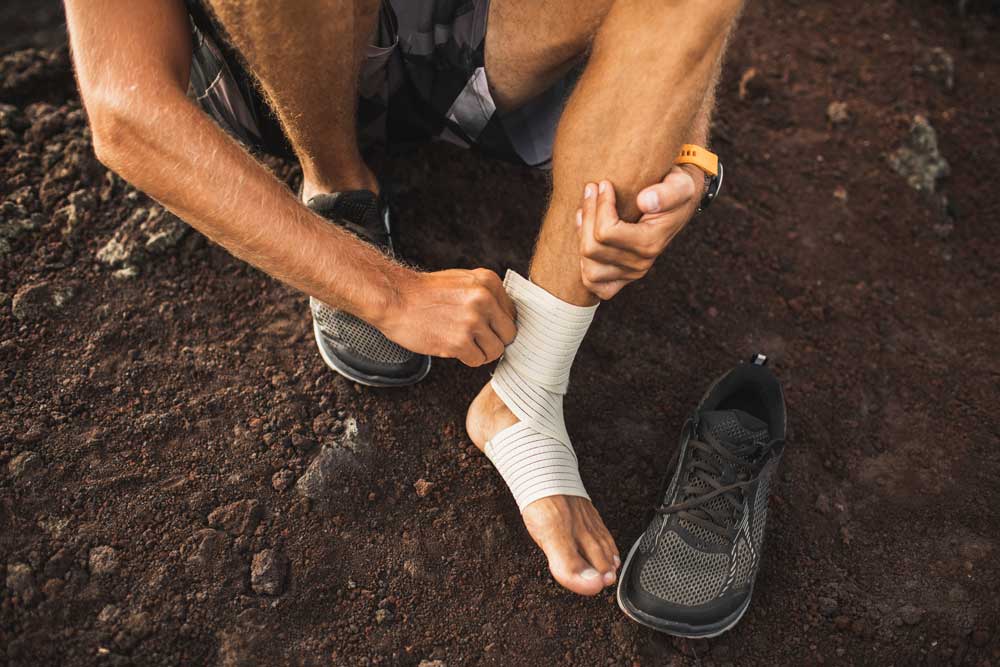
- Compression: Wrap or brace the injury to help with all the same stuff as ice.
- Elevation: Raise the injured body part above the level of your heart to reduce excess swelling and blood flow.
I can remember several instances where I sprained an ankle or knee and used the RICE protocol.
Within seconds, I got some relief. Within minutes, I felt like I was on the mend.
That’s the thing about the RICE method: you get immediate positive feedback.
Swelling goes down and pain vanishes. But what works for immediate pain relief doesn’t always translate to improved healing outcomes. After decades of unquestioning loyalty to the RICE method, therapists and coaches are wising up to a new way of thinking about injury care.
Studies continue to stack up that show each element of RICE has fatal flaws:
- Rest: Movement triggers the mechanotransduction process, where chemical growth factors are released from cells in response to loading. This improves muscle and collagen formations, laying a strong foundation for healing. You don’t get that with rest.
- Ice: Healing requires inflammation, and any protocols that block inflammation are counterproductive. The acute inflammatory response (immediately following an injury) dilates capillaries and blood vessels, increasing delivery of oxygen and nutrient-rich blood to the injury site. Inflammation also helps mobilize macrophages, a type of cell that speeds up healing and prevents infection by cleaning up damaged tissue. Macrophages release a hormone called IGF-1 into the damaged tissues, which kick-starts the healing process. Icing an injury blocks inflammation, interrupting the very processes responsible for healing.
- Compression: A metastudy covering 20+ scientific articles found no significant evidence that compression aids the healing process.
- Elevation: It may help with immediate pain and swelling symptoms but has limited scientific backing for improving outcomes.
If all that’s not enough to convince you otherwise, Dr. Mirkin—the creator of the RICE method—has publicly updated his opinion, stating that “both ice and complete rest may delay healing, instead of helping.”
Which, by the way, is exactly what a good scientist should do, and we should all thank him for that. He even went so far as to cowrite a book with author Gary Reinl and Dr. Kelly Starret titled ICED! The Illusionary Treatment Option. The book ICED! lays out an air-tight case against icing and other traditional injury treatment methods, quoting respected journals from all over the world:
“Topical cooling (icing) delays recovery.”
— Journal of Strength and Conditioning Research (2013)
“Ice is commonly used after acute muscle strains but there are no clinical
studies of its effectiveness.”
—British Journal of Sports Medicine (2012)
“There is insufficient evidence to suggest that cryotherapy [icing] improves
clinical outcome.”
—Journal of Emergency Medicine (2008)
“Ice may not be the best treatment for aching muscles—in fact, it could even
be detrimental to recovery.”
—University of Pittsburgh Medical Center (2011)
STEP 1: Apply PEACE and LOVE
RICE has fallen out of favor in the world of injury care. Some clever therapists now refer to the RICE method as the MICE method (movement, ice, compression, elevation).
But ice, compression, and elevation are not always the best methods for supporting the healing process either. We need a completely new paradigm. (And naturally, a completely new acronym.)
A 2020 article published in the British Journal of Sports Medicine by researcher Blaise Dubois and colleagues claims that soft-tissue injuries simply need PEACE and LOVE.
I’m not kidding. The title of the article is “Soft-Tissue Injuries Simply Need PEACE and LOVE.”
The acronym is a bit excessive. But it covers all the bases. And it’s grounded in good science:
- P for PROTECTION: Protect the injury during the first few days by avoiding movements that cause pain or stress the injured area.
- E for ELEVATION: Raise the injured limb (if applicable) higher than the level of your heart to minimize swelling and allow fluid to drain from the area. Follow this for the first day or two postinjury as needed.
- A for AVOID ANTI-INFLAMMATORIES: Avoid NSAIDs, ice, and other anti-inflammatories during the first few days postinjury.
- C for COMPRESSION: Use elastic bandages, tape, or wraps to reduce swelling so you can continue pain-free movements (but don’t become dependent on compression devices that provide stability to your joints—you need to keep those stabilizer muscles strong).
- E for EDUCATION: Understand the injury recovery process, let your body do its job, and avoid unnecessary medical interventions that may limit long-term healing outcomes.
- L for LOAD: Use pain as your guide for returning to activities. Pain (or lack thereof) will also tell you when it’s OK to start adding more resistance and intensity to your movements.
- O for OPTIMISM: Injuries take a toll psychologically. Expect it and know that it’s normal. Then, work on maintaining a positive, long-term mindset for getting back to full function.
- V for VASCULARIZATION: Keep moving. Get creative. Find pain-free exercises you can do that increase circulation and nutrient delivery for optimal healing.
- E for EXERCISE: Use targeted corrective exercise to strengthen weak points that may have led to the injury. You can decide for yourself the best way to remember these fundamental concepts. But one thing is clear: letting your body’s natural recovery processes run uninhibited is the real hack for optimizing injury repair.
🔬 Is inflammation good or bad when it comes to injuries?
Inflammation is part of your body’s immune response, primarily designed to heal injuries and defend the body against foreign invaders.
In the case of a burn or injury, inflammation is a critical process for healing.
Without enough inflammation, oxygen and regenerative nutrients can’t make their way to the injury site to start the healing process.
But, when inflammation stays high for a long time, a host of cascading, negative side effects start coming to the surface.
This can lead to the breakdown of joint structures, heart disease, and even damage to your gut lining.
STEP 2: Diagnose the type and severity of your injury
Here, I need to state the obvious disclaimer again. You and I are not doctors (well, you might be). So if you think you need medical treatment, by all means seek it out.
But the reality is everyone self-diagnoses their injuries.
You may not run your own MRI or determine exactly which bones are broken after falling off a ladder, but you do analyze the severity and type of injury to determine what should happen next.
Is your foot pointing in the wrong direction?
Yep, that’s pretty serious. Better call a doctor.
Are you feeling a dull ache in your elbow when performing pull ups?
That’s likely something you can fix on your own.
My point is that it’s helpful to understand the types of injuries and be able to estimate severity. That will help you decide what to do next. Including how much rest to employ, the types of movement you can safely do, and even your timelines for full recovery.
Self-Diagnosis Checklist
If you’re experiencing any of the following, you need to get help immediately:
- Abnormal joint or muscle positioning (e.g. joint or bone has moved outside its normal range of motion, or muscle has changed shape or position)
- You’ve lost the ability to put weight on the joint
- Excessive swelling, bruising or bleeding (or, dark colored bruising that appears within minutes of the injury)
- Sharp or excruciating pain
- The injury is not improving after 2-3 days of implementing the R.I.C.E. strategy
Though we always recommend getting medical help if you have any doubts — here are some signs that you have a minor injury that you can self-treat:
- Minor pain or discomfort during a specific range of motion
- Dull throbbing in joint site
- A “tweak” feeling when performing a weight bearing movement or in the stretched position (that still allows you to put weight on the joint)
Here's the key: you can still complete the movement, even if it hurts.
The joint does not “give away” or feel “loose” when performing a previously comfortable movement.
From here, you should be able to roughly determine whether you’re experiencing an acute injury (traumatic event) or overuse injury (resulting from repetitive movement).
Now let’s look at the types of injuries.
Common Injuries
According to WebMD.com, the seven most common sports injuries are:
- Ankle sprain
- Groin pull
- Hamstring strain
- Shin splints
- Knee injury/ACL tear
- Knee injury: Patellofemoral syndrome (overuse injury resulting from kneecap rubbing against thigh bone)
- Tennis elbow
This is pretty close to what I’ve seen. Although I think low back and shoulder injuries should be #1 and #2 on this list.
What’s interesting is that virtually all of the top 7 injuries listed above have an overuse component. They result not only from a sudden and dramatic injury, but repeated damage overtime.
Sure, sprained ankles can occur during sports activities even if you have rock solid musculature around your lower legs. But most likely — an imbalance, mobility issue, or muscle weakness led to the injury.
Soft tissue injuries (damage to muscles, ligaments, or tendons) fall into two main categories: acute and overuse.
Acute injuries are caused by a sudden trauma. A fall that tears ligaments in your shoulder. Or a misstep that rolls your ankle. All sprains, strains, and contusions (bruises) fall into this category.
Overuse injuries occur over time from repeated stress. Shin splints is a good example. The repeated stress of running on hard ground (and/or with bad form) causes damage to the muscles around the shin and tendon insertion points.
Here, we need to get into the weeds for just a bit.
We'll look at the common types of acute AND common overuse injuries. Understanding these types will aid you in recognizing and treating future sprains and strains.
What about back pain?
Back pain is a different animal. Though most back pain is NOT caused by injuries that affect the spine or put it at risk — you need to be sure you aren't dealing with a nerve issue or structural issue. If you are experiencing any of the symptoms below, you need to get a professional (medical) opinion. If not, then you can likely self-treat your back pain:
- Numbness or tingling
- Loss of feeling
- Loss of motor control
- Severe immobility
Sprains, Strains & Contusions
[1] “Sprain” refers to an overstretching or tearing of a ligament — a type of tissue that connects a bone to another bone.
The areas most vulnerable to sprains are ankles, knees and wrists. Sprains are classified by severity:
Injury Severity: By Grade
Grade 1 - Mild Sprain: Slight overstretching has occurred with some damage to the ligaments (not substantial tearing).
Grade 2 - Moderate: Partial tearing of the ligament has occurred.
The tell-tale sign that you have at least a Grade 2 Sprain is a “loose” feeling in the joint, or sudden instability in the joint.
Grade 3 - Severe: Complete tearing of the ligament.
You’ll usually know if this occurred because the joint is unusable and extremely painful. You can’t put weight on it without it giving way.
While Grade 2 and 3 sprains require medical attention — potentially even surgery — you can usually resolve Grade 1 sprains on your own.
Pain, swelling, and bruising will likely occur in all three grades, to different degrees.
So the key to determining the grade of injury lies in how much stability in the affected joint has been lost.
[2] “Strain” refers to minor injuries directly to muscles or tendons — the tissue that connects muscle to bone.
If you are experiencing sharp pain when attempting to perform a previously pain-free movement, you may have a severe strain (tear) that requires medical attention.
For severe injuries, an MRI (Magnetic Resonance Imaging) scan will help your doctor understand the severity of the tear.
If you experience a dull pain or twinge when performing a previously pain-free movement, but are still able to complete the movement, you likely have a partial tear.
If you play your cards right, these types of strains can be resolved within a few weeks.
The key is to not let a minor strain turn into a partial tear, or let a partial tear turn into a full-blown tear.
Sprain vs. Strain
Sprain refers to an overstretching or tearing of a ligament — a type of tissue that connects a bone to another bone.
Strain refers to minor injuries directly to muscles or tendons — the tissue that connects muscle to bone.
[3] Finally, contusions (a.k.a. bruises) are injuries to tissue resulting from a direct blow. They cause damage to muscle fibers and connective tissue — often without breaking the skin. This is why bruising occurs — it’s essentially bleeding under your skin.
Because contusions, sprains, and strains can all appear the same on the outside — purple bruising, swelling, etc. — it helps to understand what caused the injury in order to classify it.
If you banged your thigh on a metal bench, you’re likely just dealing with a simple contusion. You can continue training and moving normally, even if it hurts.
But if you experience bruising near a joint or where a muscle inserts into the joint, you might be dealing with more than just a simple contusion.
Overuse Injuries
Unlike sprains, strains and contusions — overuse injuries are caused by small stresses that repeatedly aggravate tissues.
According to Dr. David Geier, renowned orthopedic surgeon and sports medicine specialist, around 50% off all sports injuries are the result of overuse.
The percentage of overuse injuries in the general population (versus a trauma) are even higher.
While there is plenty of work that can be done to prevent sprains and strains, knowing how to prevent and manage overuse injuries is one of the most important capabilities an athlete can possess.
Tendinitis
Tendinitis is the most common overuse injury. It’s caused by repeated stress that aggravates and damages a tendon, or the sheath surrounding the tendon. Golfer’s Elbow, Shin Splints, and Jumper’s Knee are all essentially tendinitis.
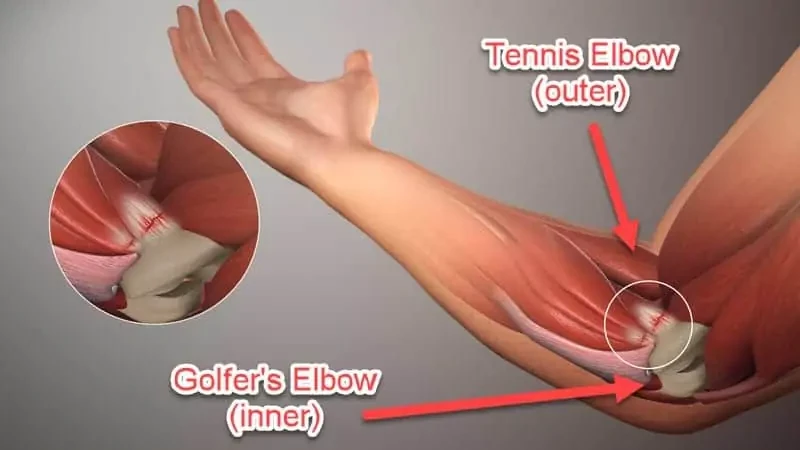
Source: Scientificanimations.com
Initial symptoms include discomfort and intermittent sharp pains. Those symptoms can quickly escalate as the tendinitis worsens, leading to more intense pain, swelling, and loss of mobility and strength.
There are three keys to conquering tendinitis:
- Intervene early and actively.
- Fix the imbalance, weakness, or fault in your posture that caused the tendinitis.
- Rebuild the damaged tendon with load-bearing exercise.
Most people think you can train your way through tendinitis. But this is rarely the case. Once it sets in, it’s difficult to get rid of without a strategic, focused plan.
And if you ignore it, your tendinitis can turn into tendinosis. And you don’t want to deal with that. Trust me on this one.
Tendinosis
Tendinosis is separate from tendinitis. It refers to the degeneration of the tendon’s collagen in response to chronic overuse.
This condition generally occurs after tendinitis has been present for a number of weeks.
If you have had tendinitis for more than 6 weeks — you’re likely dealing with tendinosis.
At this point, your body’s initial inflammatory response has come and gone. So you likely won’t see advanced swelling and redness. But you’ll still feel pain when performing movements. And without intervention, it can be become totally debilitating.
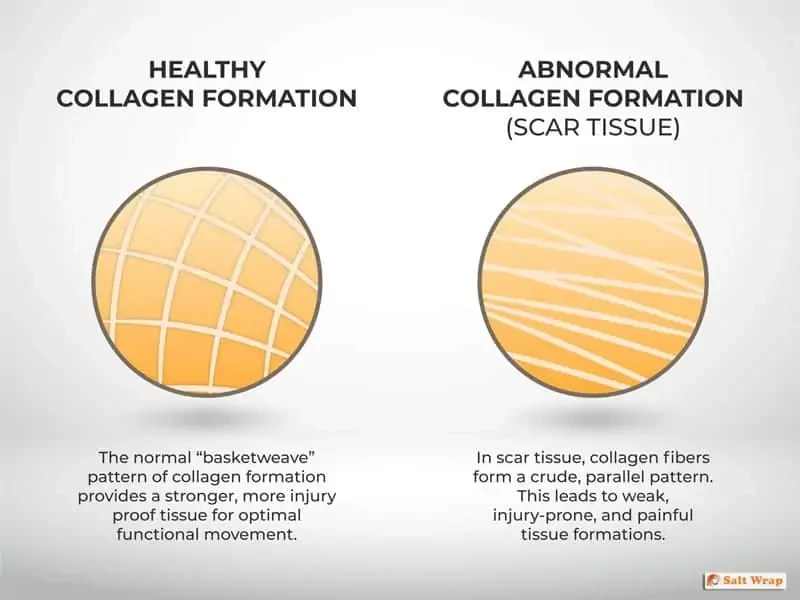
Tendinosis is characterized by abnormal collagen formation (aka scar tissue) — which is your body’s attempt to repair the injury.
Scar tissue is composed of the same protein, collagen, as the tissue it replaces during the repair process. Problem is, scar tissue doesn’t form in the same way that the initial collagen fibers were aligned.
Instead of the optimal basket-weave formation where the fibers cross over each other — scar tissue forms in crude, parallel layers. Not only is this new abnormal formation less flexible, it’s also weaker and more prone to further injury.
Turmeric, Type II Collagen, and Vitamin C all help optimize collagen synthesis. Read more
[See Related: The Definitive Guide to Collagen Synthesis]
Tendinopathy
The terms "tendinitis" and "tendinosis" have been largely replaced by a new term: tendinopathy.
Tendinopathy is a broader term that describes the degeneration of connective tissue over time. Experts now believe that tendon injuries are usually the result of long-term overuse rather than inflammation.
This means that tendon degeneration (tendinosis) is not simply the result of unchecked, chronic inflammation (tendinitis). They are two separate outcomes from the same injury.
The degeneration and weakening of connective tissue in overuse injuries has a separate cause, or pathology, from inflammation. This is why the term “tendinopathy” is now the preferred nomenclature. It more accurately describes the sliding-scale, continuum of injury outcomes.
But this is more than just a shift in wording. Many therapists and medical practitioners are moving away from recommending inflammation-blocking treatments.
To get past tendinopathy, tendons need to become stronger and poor tissue formations need to be reinforced. This can only happen with progressive, load-based exercise.
I’ve found that two tactics, in combination, do wonders for healing tendinopathy: self-myofascial release and eccentric training. Both help break down scar tissue so your body can rebuild the collagen matrix in an optimal pattern.
Bursitis
Bursitis is not as common as tendinitis. And is typically easier to diagnose. In this condition, the bursae (soft, fluid filled sacks that surround and protect joints) become inflamed. It’s usually caused by performing repetitive movements with bad form or by general overuse.
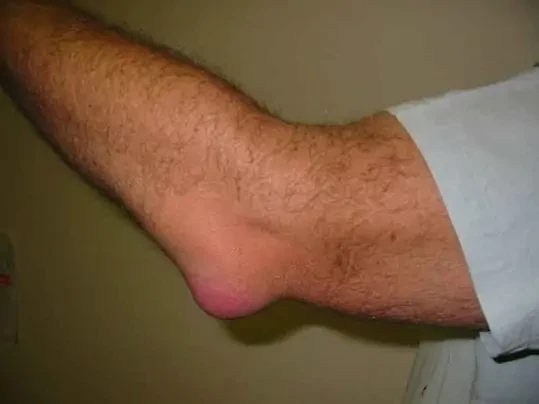
Source: Wikimedia
Although it’s rare to have an inflamed bursa the size of a golf ball sticking off your elbow or knee, you’ll likely notice a round protruding sack from the area of injury.
Though bursitis can resolve itself, you should seek medical attention if you think you have bursitis. The inflamed bursa can become infected, or it may require a minimally invasive surgical removal. Your doctor will likely recommend a mix of NSAIDs and corticosteroid injections to get rid of the pain and swelling.
...OK... we got through it! Those are the common types of injuries you should be aware of.
At this point, you’re just about ready to put together a rehab plan. But first, you need to understand what caused the injury.
STEP 3: Understand the cause
After you’ve gone through the logic of Step 2 (understanding type and severity of injury), you’re half way to understanding what caused it.
We use a simple checklist for this step.
Acute vs. Overuse Injury: Simple Diagnostic List
- Was the injury the result of a dramatic event? (fall, dive, stretching outside of normal range of motion, performing explosive movement, performing heavy weight-bearing movement)
- Do you have a history of injury or surgery at the injury site?
- Did the injury occur after performing a new exercise you are not well-trained in?
- Have you experienced pain, discomfort, tingling, or weakness in the injury site prior to the injury?
- Did the injury slowly progress, starting with minor discomfort?
If you answered Yes to any of questions 1-3, you’re likely dealing with an acute injury.
If you answered Yes to questions 4 or 5 (but not to questions 1-3), you’re likely dealing with an overuse injury.
This isn’t an exact science, so you have to use some common sense here.
People typically know if they injured themselves suddenly (acute). Likewise, if you think back — you should be able to recall if pain or movement problems occurred gradually (overuse).
The reason you want to understand the cause of the injury is so you don’t make it worse. And so you don’t end up doing it again.
Like in my case of developing tendinosis in both elbows, there was a multitude of factors. It took me weeks to put everything together. But now that I know each misstep I made, I know exactly how to prevent it from occurring again.
The important thing here is not to rush to a conclusion. Get an idea of what movements, events, imbalances, and weaknesses could have led to the injury.
Then think about other lifestyle factors (like sitting at a desk all day which constricts movement and blood flow). And continue seeking to understand all the factors that caused your injury throughout the rehab process.
This leads us into Step 4: Develop a rehabilitation plan.
STEP 4: Develop a rehab plan
To give us some context, let’s zoom out and look at goals that can be applied to virtually any minor injury.
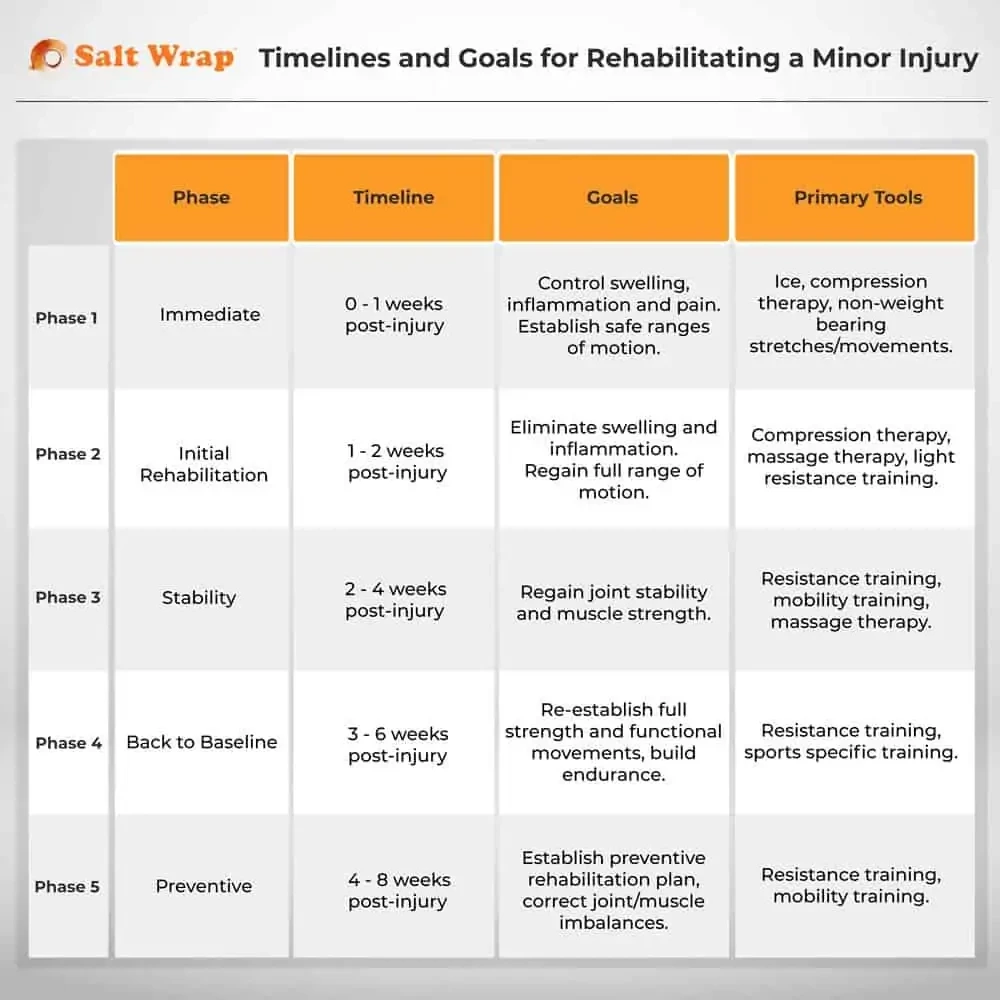
Assuming you have a minor injury, you can establish some rough timelines for when to graduate through each phase of recovery.
Phase 1: Immediate
This is the time period immediately following the injury. The main goals are to control swelling, inflammation, and pain — as well as establish safe ranges of motion. This phase can also be used to more accurately assess the seriousness of the injury. This is the time to get in with a trusted physical therapist and create a plan for the next 6-8 weeks.
As you begin moving through basic ranges of motion, you’ll be able to tell whether normal movements are possible without severe pain, looseness in the joint, or a feeling of impending injury if you continue the exercise.
Examples of non-weight bearing movements for a knee problem might include seated flexion and extension, and light stretching of the quadriceps and hamstrings.
Assuming these basic movements are possible without risking further injury, this first week is crucial for establishing how the tissues will heal. So again, movement is your friend.
The duration of this phase is typically around a week, and depends upon the progress of swelling, inflammation, and pain-free ranges of motion.
Phase 2: Initial Rehabilitation
The main goals of this phase are to eliminate swelling and inflammation, and regain full range of motion. Ice therapy is no longer necessary, but compression therapy may be useful during light resistance and stretching movements to help tack down and re-establish proper joint tissue positioning.
Manual therapy (massage therapy) can be started here to reduce pain and guarding, along with some light resistance training . Examples of light resistance training for an elbow injury could include isometric bicep curls with an elastic band, weighted wrist exercises, or modified pushups with knees on the floor — all dependent upon pain and strength levels.
Phase 3: Stability
While mobility through normal ranges of motion is vital to preventing a future injury and functioning normally — your focus here should be on improving joint positioning and establishing a solid structure.
This is accomplished by performing compound exercises with a focus on perfect form through pain-free ranges of motion.
I have an ax to grind with this step...
Because I spent countless hours following boring stretching routines to “rehab” my busted up shoulders over the years. Now I know that I would have been better served to focus first on mastering shoulder stability (instead of mobility/flexibility).
The bottom line is this: before you get fancy —focus on mastering basic movements through full ranges of motion. For the shoulder, that would include being able to press weight overhead (into full extension) and perform a weighted row — even if you have to start with super light weights.
And, make sure your form is perfect, and the start and end joint positions are optimal.
Stability > Mobility.
Phase 4: Back to Baseline
n this phase, the goal is to return strength, mobility and performance to where it was prior to the injury. This means increasing resistance, working through more difficult ranges of motion with mobility (flexibility) training and incorporating sports-specific movements to challenge the nervous system.
But, if your recovery progresses more slowly than what is outlined above, don't push it. Listen to your body, and at all costs, prevent further injury.
Phase 5: Preventive
This final phase is also the one most commonly skipped. The primary goal here is to not only understand the factors that led to the injury, but to use pre-habilitative (prehab) movements to mobilize stiff tissues and build strength in order to correct muscle imbalances.
Once again, diving into specific case scenarios is way beyond this article. It would take books.. But with some common sense, a little research on your end, and potentially leaning on professionals to help you assemble a post-injury plan — you can setup your own prehab plan.
And, you should.
You should understand the causes, how to address them, and what to do if the injury occurs again. Or, more commonly — if minor symptoms approximating the injury surface later. The second time around you’ll see the warning signs and be able to intervene before it gets serious.
The specifics of your rehab plan are highly individual, including the exercises you should perform. I encourage you to seek help from a doctor or physical therapist here. And do your own research as well. No one knows your body quite like you do. So it’s important you understand the commonly prescribed approaches for your situation, and the desired timelines and outcomes.
Keys to Rehab Plan Success
- Understand the 5 phases and establish reasonable goals and timelines for each
- Prioritize positioning over mobility. Yanking on your injured joints and muscles with forced stretches might not be a good idea. Instead prioritize proper joint positioning. Then focus on establishing pain-free normal ranges of motion.
- Commit to a post-rehab plan for at least 6 weeks. That means follow a specific prehab routine for 6 weeks AFTER you feel your injury is nearing 100% healed. Don't simply stop when it feels better, or you'll end up back where you started.
- Injury Rehab Nutrition: Make smart eating and smart supplementation part of your rehab plan to optimize healing times and tissue formation. [See Supplements for Injury Recovery and The Definitive Guide to Collagen Synthesis]
Step 5: Create a template to address flair ups or minor recurrences of the injury
This one right here separates the men from the boys.
Or more accurately, separates the people who remain strong and vital throughout their life… from those who are plagued by injuries.
The sad reality is that once you injure yourself, your body is different. The tissues have been permanently altered.
And all those little injuries add up. Especially the ones that are RE-injuries of previous ones.
“In those days, I did what was necessary for me to win. This included training with heavy weights: a precursor for injury. So if I could do it over again I’d train with lighter weights, higher reps, no sets below 10 reps, with negatives slower than positives, and avoid injury. If I had done that, my physique wouldn’t have been quite as bulky, but with more definition and less pain.”

Source: Wikimedia
Frank Zane was the master of form and proportions. Compared to other bodybuilders of his day, Zane’s approach was out of the ordinary. He focused on lighter weights, higher repetitions, and absolutely perfect form.
We're not knocking heavy weight training. It certainly has a place in safe, pain-free exercise programming when applied intelligently. The main point is that Zane understood that even minor injuries add up over time.
Especially RE-injuries of previous ones.
Six months may go by. A year. Three years. But eventually, you’ll feel a pain in that old injury area.
What are you going to do about it?
If you’re like most people, you’ll do the same thing you did the first time. You'll ignore it. Or wait too long to intervene with corrective exercise.
Instead, outsmart it. Take notes on your entire experience the FIRST time.
The timelines, the exercises, what hurt, what helped. And use that do develop a template for fixing the injury when it comes back.
You don’t have to wait for a full-blow tear to employ this either.
In my case, I have a printout of a daily routine that incorporates stretching, resistance training and massage therapy if I feel a twinge in my elbows again from my bout with tendinopathy. And a weekly approach that allows me to continue training without further injury.
The few times I’ve really torqued my elbows with a heavy week of training or doing something stupid in the gym, I’ve been able to resolve the pain in just a few days.
Your goal here is to create a template that makes the rehab process think-less. Which is good. Because the knuckle-dragging side of you might just decide (again) that you’re going to tough it out.
Step 5 is about being smart. And disciplined. Both necessary attributes if you want to avoid injury and be able to use your body to its potential — especially as the years go by.
The Final Step: Turning Off the CCTV Cameras
In the textbook Sports Injury Prevention and Rehabilitation, David Joyce and colleagues lay out a perfect metaphor for the final step of injury healing: turning off the CCTV cameras.
CCTV (closed-circuit television) is the common name for private video surveillance technology that allows you to watch recorded events in real time. When you see a TV monitor mounted behind the clerk’s desk at a gas station with a view of the pumps, that’s CCTV.
Just like a gas station owner who’s been burned too many times by thieves, your brain ramps up surveillance of all your movements after an injury. It wants to know what is going on at all times —especially with the injured body part.
This leads to pain sensitization (aka pain hypersensitivity). While this is helpful in the beginning phases of healing, it becomes a problem as you graduate to the final stages of recovery.
At worst, it leads to an obsessive focus on any uncomfortable sensation and altered movement patterns that prevent full recovery. At best, the constant fear of re-injury decreases motivation, taking a toll on your mental health as well.
Completing the final step—turning off the CCTV cameras—requires understanding three things:
- Even after the injury site is 99% healed, undesirable neuromuscular changes are likely still present.
- Foreign sensations, movement alterations, and other changes to your nervous system caused by injury can take months, or longer, to resolve.
- Your body needs a confident, calm, restorative environment for your central nervous system to back off the surveillance.
This is one of the most unnerving aspects of injury recovery because you can’t simply grit your teeth through it. Understanding that injuries have lasting psychological and neurological effects is important so you know what to expect and maintain faith that you’ll eventually get past it.
Conclusion
I hope this article helped you understand how to approach injuries from a strategic perspective.
While your body and injuries are unique, you can use this framework to assess the seriousness of your injury, and figure out the appropriate next steps.
And of course, seek medical attention if you have any doubts.
With a little research — you can assemble your own post-injury rehabilitation plan.
Just don’t forget that “prehab” is just as important.
And, after focusing on the BIG stuff outlined in this article — you've earned the right to check out the supplements proven to bolster the injury recovery process.
After reading this article, how will you change your attitude toward injury prevention and post-injury rehab?
Let us know what you think in the comments section below.
A Complete Guide to Rebuilding
If you have a history of injuries, your training and nutrition needs to evolve. This is why I wrote Built from Broken: A Science-Based Guide to Healing Painful Joints, Preventing Injuries, and Rebuilding Your Body.
Learn how my best-selling injury prevention and recovery book can help you here.
Founder: Scott Hogan

I created SaltWrap to bring together the most practical ideas in therapeutic sports nutrition, corrective exercise, and functional fitness — with the goal of keeping you (and myself) strong, mobile, and built to last.
I've worked as an A.C.E. Certified Personal Trainer, Orthopedic Exercise Specialist, and nutritional supplement formulator.
But more importantly — I've spent most of my life battling injuries, joint pain, and just being plain beat up. So I know what it's like to struggle toward fitness goals.
SaltWrap is here to push you through injuries, setbacks and perceived physical limitations. To a place beyond what you think you're capable of. Sign up here to stay in the loop.
Learn more about my best-selling injury prevention and recovery book, Built from Broken.

